比特币源码学习0.13(二)
源码0.13.2版的,在sublime中打开的
默认文件在src文件夹下,ide改为sublime,在跳转到定义的体验好很多
6.2选择比特币网络
比特币网络分为主网、测试网以及私有网三种网络:
主网:Main network
测试网:Testnet (v3)
私有网:Regression test
接上面的代码
 // Check for -testnet or -regtest parameter (Params() calls are only valid after this clause)
        try {
            SelectParams(ChainNameFromCommandLine());
        } catch (const std::exception& e) {
            fprintf(stderr, "Error: %s\n", e.what());
            return false;
}代码注释的含义为检查testnet或regtest参数(Params()仅在该子句之后生效),try子句中调用了SelectParams()函数,是以ChainNameFromCommandLine()的返回值作为参数,先来看ChainNameFromCommandLine()函数,位于chainparamsbase.cpp中
std::string ChainNameFromCommandLine()
{
    bool fRegTest = GetBoolArg("-regtest", false);
    bool fTestNet = GetBoolArg("-testnet", false);

    if (fTestNet && fRegTest)
        throw std::runtime_error("Invalid combination of -regtest and -testnet.");
    if (fRegTest)
        return CBaseChainParams::REGTEST;
    if (fTestNet)
        return CBaseChainParams::TESTNET;
return CBaseChainParams::MAIN;首先获取-testnet与-regtest的参数设置,两个都设置的话扔出错误,根据设置返回,都没设置的话返回主网。
class CBaseChainParams
{
public:
    /** BIP70 chain name strings (main, test or regtest) */
    static const std::string MAIN;
    static const std::string TESTNET;
static const std::string REGTEST;返回值为字符串常量,在chainparamsbase.h的定义如上,在chainparamsbase.cpp定义如下
const std::string CBaseChainParams::MAIN = "main";
const std::string CBaseChainParams::TESTNET = "test";
const std::string CBaseChainParams::REGTEST = "regtest";在获得链的网络名称后,我们来看SelectParams()这个函数,位于chainparams最后几行
void SelectParams(const std::string& network)
{
    SelectBaseParams(network);
    pCurrentParams = &Params(network);
}这个函数中首先调用SelectBaseParams函数,位于chainpatamsbase.cpp
void SelectBaseParams(const std::string& chain)
{
    pCurrentBaseParams = &BaseParams(chain);
}这个函数是实现对pCurrentBaseParams的赋值,pCurrentBaseParams是CBaseChainParams类型的
static CBaseChainParams* pCurrentBaseParams = 0;而CBaseChainParams是三种网络类型参数的基类,三种网络参数类位于chainpatamsbase.cpp
class CBaseMainParams : public CBaseChainParams
{
public:
    CBaseMainParams()
    {
        nRPCPort = 8332;
    }
};
static CBaseMainParams mainParams;

/** * Testnet (v3) */
class CBaseTestNetParams : public CBaseChainParams
{
public:
    CBaseTestNetParams()
    {
        nRPCPort = 18332;
        strDataDir = "testnet3";
    }
};
static CBaseTestNetParams testNetParams;

/* * Regression test */
class CBaseRegTestParams : public CBaseChainParams
{
public:
    CBaseRegTestParams()
    {
        nRPCPort = 18332;
        strDataDir = "regtest";
    }
};
static CBaseRegTestParams regTestParams;在每个类的构造函数中定义了对应使用的端口以及数据保存目录。再来看BaseParams()的函数实现,位于chainpatamsbase.cpp
CBaseChainParams& BaseParams(const std::string& chain)
{
    if (chain == CBaseChainParams::MAIN)
        return mainParams;
    else if (chain == CBaseChainParams::TESTNET)
        return testNetParams;
    else if (chain == CBaseChainParams::REGTEST)
        return regTestParams;
    else
        throw std::runtime_error(strprintf("%s: Unknown chain %s.", __func__, chain));
}
就是根据传入的参数返回对应的参数类对象。
最后再来看SelectParams中的pCurrentParams = &Params(network);,可以发现Params()函数与BaseParams()函数实现是一样的,都是根据传入参数获取对应的类对象,区别在于返回类对象的不同,Params()返回的是CChainParams&类型的,这个类型是链的三个不同网络参数的基类,截取部分代码可以看到,这个类相比带base的类的配置信息更多,可以理解为base是基本参数,这一步是设置相应链的主要参数
//chainparams.cpp
class CMainParams : public CChainParams {
public:
    CMainParams() {
        strNetworkID = "main";
        consensus.nSubsidyHalvingInterval = 210000;//区块奖励减半间隔
        consensus.nMajorityEnforceBlockUpgrade = 750;
        consensus.nMajorityRejectBlockOutdated = 950;
        consensus.nMajorityWindow = 1000;
        consensus.BIP34Height = 227931;
        consensus.BIP34Hash = uint256S("0x000000000000024b89b42a942fe0d9fea3bb44ab7bd1b19115dd6a759c0808b8");
        consensus.powLimit = uint256S("00000000ffffffffffffffffffffffffffffffffffffffffffffffffffffffff");//算力极限值
        consensus.nPowTargetTimespan = 14 * 24 * 60 * 60; // two weeks
        consensus.nPowTargetSpacing = 10 * 60;//算力修改间隔
        // The best chain should have at least this much work.
        consensus.nMinimumChainWork = uint256S("0x0000000000000000000000000000000000000000003418b3ccbe5e93bcb39b43");//最低工作量
        //创世块,第一个块奖励50个比特币
        genesis = CreateGenesisBlock(1231006505, 2083236893, 0x1d00ffff, 1, 50 * COIN);
        ···
这段参数设置代码的参数中,我们主要关注下共识参数与创世区块信息的参数
consensus::Params consensus;//chainparams.h
CBlock genesis//chainparams.cpp
主要来看主网中对这些参数的相关设置,⬆️看上面一段,添加备注的参数是经常听到的名次,如果要创建自己的数字货币,修改这些参数就可以了。所以创建一个新的货币并不难,关键在于是否有价值。
6.3RPC命令行判断
回到bitcoin.cpp继续参数解析部分
 // Command-line RPC
        bool fCommandLine = false;
        for (int i = 1; i < argc; i++)
            if (!IsSwitchChar(argv[i][0]) && !boost::algorithm::istarts_with(argv[i], "bitcoin:"))
                fCommandLine = true;

        if (fCommandLine)
        {
            fprintf(stderr, "Error: There is no RPC client functionality in bitcoind anymore. Use the bitcoin-cli utility instead.\n");
            exit(EXIT_FAILURE);
}上述代码对输入的参数逐个判断,首先通过IsSwitchCahr函数
//util.h
inline bool IsSwitchChar(char c)
{
#ifdef WIN32
    return c == '-' || c == '/';
#else
    return c == '-';
#endif
}判断参数是否有’-‘或’/’,并且不包含’bitcoin:’,带有不包含”-“的参数会报错,提示使用bitconi-cli

6.4 服务参数设置
默认bitcoind是打开服务器端
//bitcoind.cpp
SoftSetBoolArg("-server", true);函数SoftSetBoolArg()的实现在util.cpp中
bool SoftSetBoolArg(const std::string& strArg, bool fValue)
{
    if (fValue)
        return SoftSetArg(strArg, std::string("1"));
    else
        return SoftSetArg(strArg, std::string("0"));
}
bool SoftSetArg(const std::string& strArg, const std::string& strValue)
{
    if (mapArgs.count(strArg))
        return false;
    mapArgs[strArg] = strValue;
    return true;
}调用了SoftSetArg函数,strArg被赋值为server,那么首先在mapArgs(之前有介绍)中查找是否存在server,如果存在就不做处理,否则按传入的值设置。
7.初始化日志
回到bitcoind.cpp继续后面的代码
//init.cpp
void InitLogging()
{
    //-printtoconsole 日志信息发送到控制台,默认不发送到控制台
    fPrintToConsole = GetBoolArg("-printtoconsole", false);
    //-logtimestamps 在日志中打印时间戳,默认打印
    fLogTimestamps = GetBoolArg("-logtimestamps", DEFAULT_LOGTIMESTAMPS);
    //-logtimemicros 在日志中按微妙格式打印,默认不按
    fLogTimeMicros = GetBoolArg("-logtimemicros", DEFAULT_LOGTIMEMICROS);
    //-logips 在日志中打印ip,默认不包含
    fLogIPs = GetBoolArg("-logips", DEFAULT_LOGIPS);

    LogPrintf("\n\n\n\n\n\n\n\n\n\n\n\n\n\n\n\n\n\n\n\n");
    LogPrintf("Bitcoin version %s\n", FormatFullVersion());
}
其中三个默认参数
//util.h
static const bool DEFAULT_LOGTIMEMICROS = false;//按微秒格式打印
static const bool DEFAULT_LOGIPS        = false;//包含ip地址
static const bool DEFAULT_LOGTIMESTAMPS = true;//打印时间戳
看一下日志打印内容
8.InitParameterInteraction
初始化参数交互处理,设置后都会打印对应的语句
1)绑定并监听地址
//init.cpp
// Parameter interaction based on rules
void InitParameterInteraction()
{
    // when specifying an explicit binding address, you want to listen on it
    // even when -connect or -proxy is specified
    if (mapArgs.count("-bind")) {
        if (SoftSetBoolArg("-listen", true))
            LogPrintf("%s: parameter interaction: -bind set -> setting -listen=1\n", __func__);
    }
    if (mapArgs.count("-whitebind")) {
        if (SoftSetBoolArg("-listen", true))
            LogPrintf("%s: parameter interaction: -whitebind set -> setting -listen=1\n", __func__);
}在指定显式绑定地址时,即使在指定-connect或-proxy时,也要监听它。绑定地址有两种参数,分别是bind和whitebind,从代码看对这两种参数的处理方式是相同的。
这里看一下LogPrintf函数,通过调用LogPrint实现
//util.h
/** Return true if log accepts specified category */
bool LogAcceptCategory(const char* category);
/** Send a string to the log output */
int LogPrintStr(const std::string &str);
#define LogPrintf(...) LogPrint(NULL, __VA_ARGS__)

template<typename T1, typename... Args>
static inline int LogPrint(const char* category, const char* fmt, const T1& v1, const Args&... args)
{
    if(!LogAcceptCategory(category)) return 0;                            \
    return LogPrintStr(tfm::format(fmt, v1, args...));
}LogPrint对日志是否接收制定目录做判断,然后调用的是LogPrintStr
//util.cpp
int LogPrintStr(const std::string &str)
{
    int ret = 0; // Returns total number of characters written
    static bool fStartedNewLine = true;
    //添加时间戳
    string strTimestamped = LogTimestampStr(str, &fStartedNewLine);
    if (fPrintToConsole)//在7.初始化日志有设置
    {// print to console
        ret = fwrite(strTimestamped.data(), 1, strTimestamped.size(), stdout);
        fflush(stdout);
    }
    else if (fPrintToDebugLog)
    {
        boost::call_once(&DebugPrintInit, debugPrintInitFlag);
        boost::mutex::scoped_lock scoped_lock(*mutexDebugLog);

        // buffer if we haven't opened the log yet
        if (fileout == NULL) {
            assert(vMsgsBeforeOpenLog);
            ret = strTimestamped.length();
            vMsgsBeforeOpenLog->push_back(strTimestamped);
        }
        else
        {
            // reopen the log file, if requested
            if (fReopenDebugLog) {
                fReopenDebugLog = false;
                //日志的默认地址对应路径下的debug.log
                boost::filesystem::path pathDebug = GetDataDir() / "debug.log";
                if (freopen(pathDebug.string().c_str(),"a",fileout) != NULL)
                    setbuf(fileout, NULL); // unbuffered
            }

            ret = FileWriteStr(strTimestamped, fileout);
        }
    }
    return ret;
}&fStartedNewLine是由调用上下文保存的状态变量,当不进行换行的多个调用时,将抑制时间戳的打印。将其初始化为true,并将其保存在调用上下文中。
LogPrintStr首先根据fStartedNewLine调用LogTimestampStr添加时间戳,其中根据fLogTimeMicros决定是否添加微秒的时间。根据条件输出到对应的设备中。
2)连接可信节点
查找mapArgs是否包含-connect参数,包括则将-dnsseed(使用dns查找)和-listen(接受外部的连接,并对其进行监听)设置为false,并打印。
3)代理模式
查找mapArgs参数中是否包含-proxy参数,如果包含则将-listen、-upnp、-discover都设置为false。
4)监听设置处理
//net.h
/** -listen default */
static const bool DEFAULT_LISTEN = true;如果-listen参数不为DEFAULT_LISTEN,即-listen为false则-upnp、-discover(自动默认发现地址)、-listenonion(匿名地址监听)都设置为false。
5)外部ip参数处理
查找mapArgs参数中是否包含-externalip参数,存在则将-discover设置为false,即不用查找其他的ip。
6)重新扫描钱包参数设置
如果-salvagewallet(尝试在启动时从毁坏的钱包恢复私钥)或-zapwallettxes(删除所有钱包交易,只恢复部分)设置为true,则将-rescan设置为true,重新扫描钱包。
7)区块模式参数设置
//net.h
/** Default for blocks only*/
static const bool DEFAULT_BLOCKSONLY = false;如果-blocksonly设置为true,则将-whitelistrelay、-walletbroadcast设置为false。
8)强制白名单连接参数
//main.h
/** Default for DEFAULT_WHITELISTFORCERELAY. */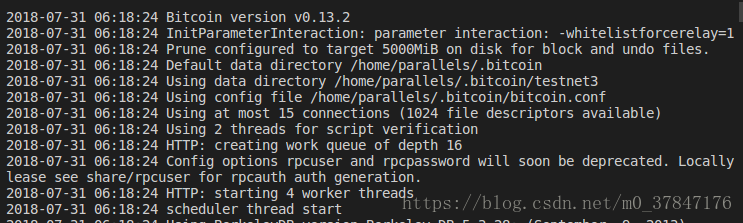
static const bool DEFAULT_WHITELISTFORCERELAY = true;来自白名单主机的强制中继意味着我们将首先接受来自它们的中继。默认有白名单,将-whitelistrelay设置为true。可以看前面的截图第二行就是对应的打印内容。
更多精彩内容

