亲测:window 10 与 Mac 两个环境一起搭建成以太坊私有链网络(ethereum 私有链)
Window 搭建:
前面准备:
geth环境:从官网下载:https://geth.ethereum.org/downloads/,安装好之后,cmd进入目录运行:geth -help看看是否可用geth命令
下载安装好mist钱包(Etheum Wallet 和Mist的区别是,mist比Etheum Wallet多web3浏览器功能):https://github.com/ethereum/mist/releases/
1、准备创世文件:CustomGenesis.json
内容如下:
{
"nonce": "0x0000000000000042",
"timestamp": "0x00",
"parentHash": "0x0000000000000000000000000000000000000000000000000000000000000000",
"extraData": "0x00",
"gasLimit": "0x8000000",
"difficulty": "0x400",
"mixhash": "0x0000000000000000000000000000000000000000000000000000000000000000",
"coinbase": "0x3333333333333333333333333333333333333333",
"alloc": {
},
"config": {
"chainId": 15,
"homesteadBlock": 0,
"eip155Block": 0,
"eip158Block": 0
}
}
2、创建私有网络:
geth --identity "privateFour" --datadir "C:\Users\yu\PrivateNet\privateFour" --rpcapi "db,eth,net,web3,admin,personal,rpc" --networkid 100 init "C:\Users\yu\PrivateNet\privateFour\CustomGenesis.json"
参数描述
identity
区块链的标示,随便填写,用于标示目前网络的名字
datadir
设置当前区块链网络数据存放的位置
port
网络监听端口
rpc
启动rpc通信,可以进行智能合约的部署和调试
rpcapi
设置允许连接的rpc的客户端,一般为db,eth,net,web3
networkid
设置当前区块链的网络ID,用于区分不同的网络,是一个数字
init
指定创世块文件的位置,并创建初始块
3、启动私有网络:
geth --datadir "C:\Users\yu\PrivateNet\privateFour" --identity "privateFour" --rpc --rpcapi "db,eth,net,web3,admin,personal,rpc" --rpccorsdomain "*" --networkid 100 console 2>>eth_output.log
4、获取encode信息:
启动的终端中通过admin.nodeInfo 查看到encode信息:
"enode://13b6b674addb089dfcb90ea023dc93e9b6eecd95e5f5eba4132c89d5a0c07a8b90fce4a5436da6f78ac18cb0f0eed12b3c32461cf7ff8835f3e311c5a32ce188@[::]:30303"
注意:[::] 需要用本地ip地址替换:
"enode://13b6b674addb089dfcb90ea023dc93e9b6eecd95e5f5eba4132c89d5a0c07a8b90fce4a5436da6f78ac18cb0f0eed12b3c32461cf7ff8835f3e311c5a32ce188@192.168.152.1:30303"
5、创建地址并挖矿:挖矿一定余额为后面测试是否在同一个网络用
查看地址:eth.accounts
创建地址及密码:personal.newAccount("123456")
开始挖矿:miner.start()
停止挖矿:miner.stop()
获取余额:eth.getBalance(eth.accounts[0])
至此,window环境已经私有网络已经建立好。
Mac环境搭建网络:
geth环境已经安装,mac环境下如何建立geth见链接:https://blog.csdn.net/ziyuzhiye/article/details/54614288
1、准备创世文件:CustomGenesis.json
内容如下:
{
"nonce": "0x0000000000000042",
"timestamp": "0x00",
"parentHash": "0x0000000000000000000000000000000000000000000000000000000000000000",
"extraData": "0x00",
"gasLimit": "0x8000000",
"difficulty": "0x400",
"mixhash": "0x0000000000000000000000000000000000000000000000000000000000000000",
"coinbase": "0x3333333333333333333333333333333333333333",
"alloc": {
},
"config": {
"chainId": 15,
"homesteadBlock": 0,
"eip155Block": 0,
"eip158Block": 0
}
}
2、创建私有网络:
geth --identity "macone" --datadir "/Users/yu/Documents/ethereumdev/privatenet/macone/" --rpcapi "db,eth,net,web3,admin,personal,rpc" --networkid 100 init "/Users/yu/Documents/ethereumdev/privatenet/macone/CustomGenesis.json"
3、启动私有网络:
geth --datadir "/Users/yu/Documents/ethereumdev/privatenet/macone" --identity "macone" --rpc --rpcapi "db,eth,net,web3,admin,personal,rpc" --rpccorsdomain "*" --networkid 100 console 2>>eth_output.log
4、打开mist终端报错:不同于window环境,mac环境下会报错,原因及解决办法见:
https://segmentfault.com/a/1190000013635759?utm_source=channel-hottest 不过里面的终端启动路径写错了,头部应该多一个Applications/:
命令行启动Ethereum Wallet命令:
./Ethereum\ Wallet.app/Contents/MacOS/Ethereum\ Wallet --rpc "私有链ipc地址"
换成:
/Applications/Mist.app/Contents/MacOS/Mist--rpc "/Users/yu/Documents/ethereumdev/privatenet/macone/geth.ipc"
5、mac创建地址并挖矿:同window一样
6、把window环境下的私有链节点添加到 mac:
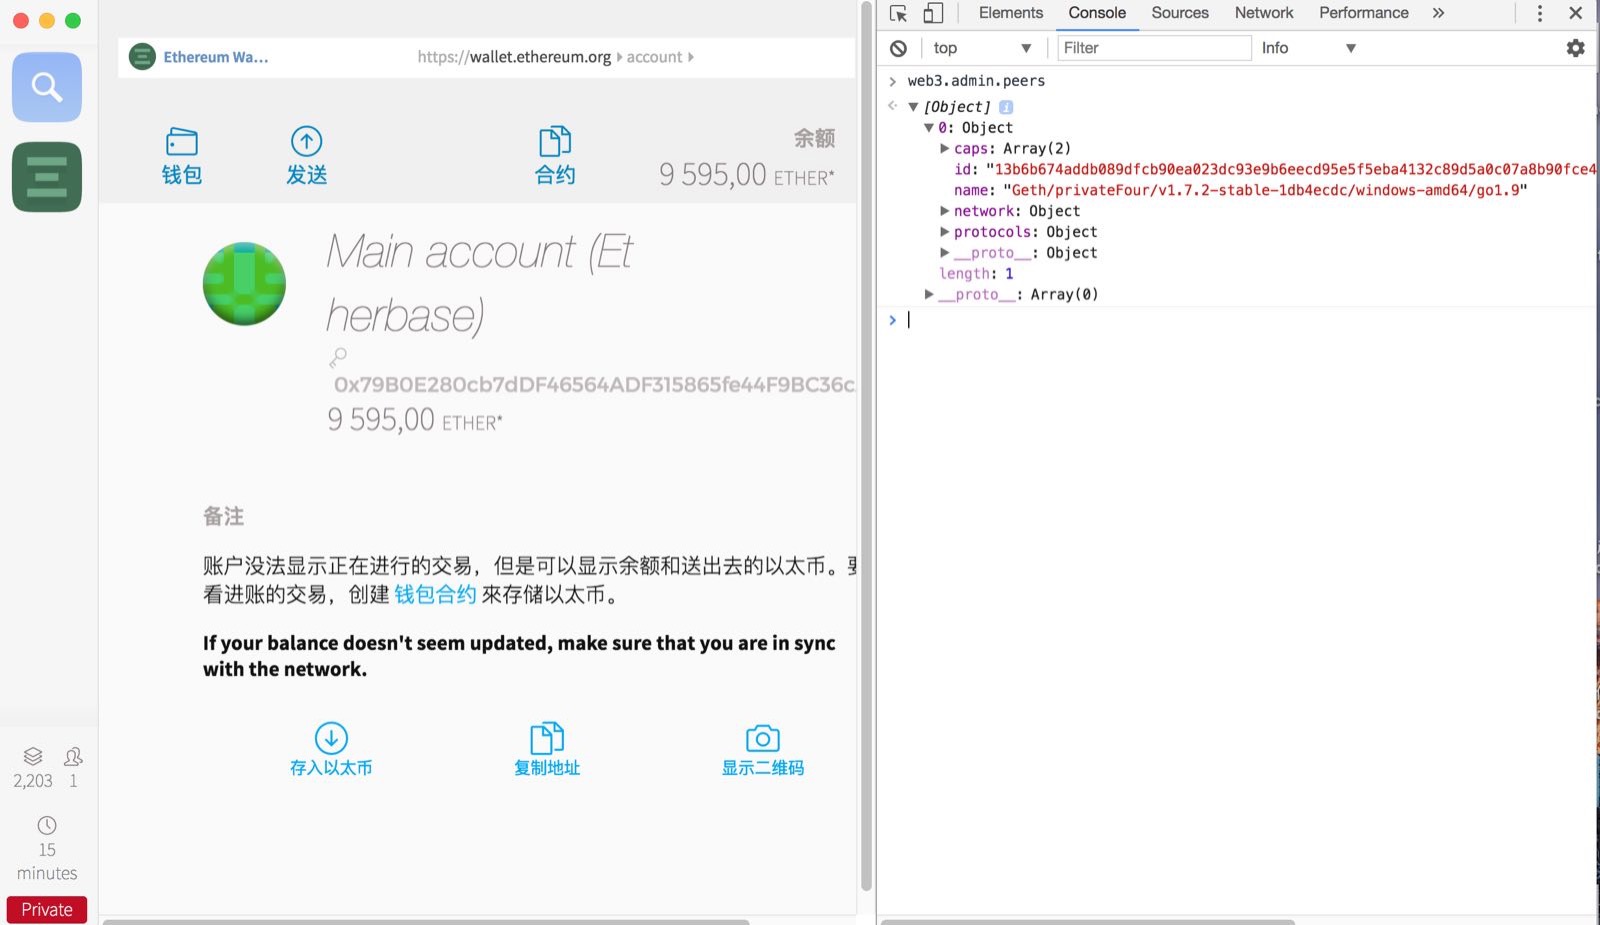
mist开发中的,通过web3.admin.addPeer添加节点,查看节点是否一致:
web3.admin.addPeer("enode://13b6b674addb089dfcb90ea023dc93e9b6eecd95e5f5eba4132c89d5a0c07a8b90fce4a5436da6f78ac18cb0f0eed12b3c32461cf7ff8835f3e311c5a32ce188@192.168.152.1:30303")
7、至此,测试两个终端互相转账是否成功。
更多精彩内容

